
- Proper subfloor preparation prevents moisture damage, ensures stability, and protects the longevity of tile installations.
- Preparation methods vary by subfloor material and require careful evaluation, leveling, and cleaning before tiling.
- Foothills Flooring & Tile delivers expert subfloor preparation, ensuring homeowners receive tile installations that are both beautiful and built to last.
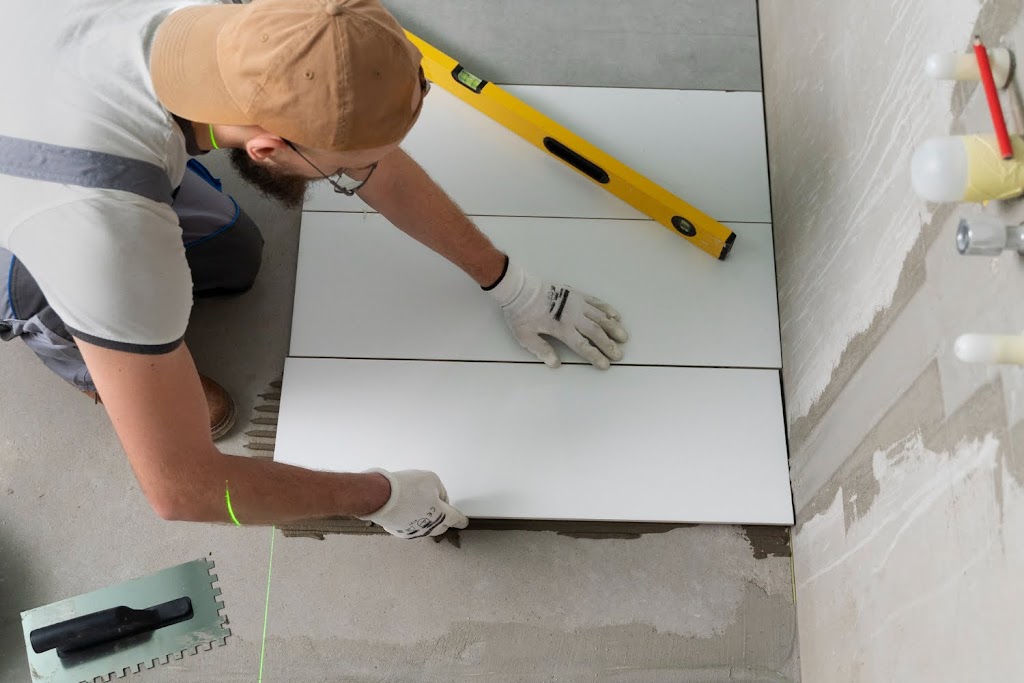
When people think about re-tiling a space, they often imagine the finished surface, whether it is a kitchen floor gleaming with ceramic tiles or a bathroom refreshed with modern porcelain. However, what lies beneath those tiles matters just as much as the visible surface. Proper subfloor preparation is the foundation of a long-lasting installation. Without it, even the most carefully chosen tiles and the most skilled workmanship can fail prematurely.
Let’s explore why subfloor prep is so important, what it involves, and how professionals approach the process to ensure durability, safety, and beauty in flooring projects.
Understanding the Role of the Subfloor
The subfloor is the base layer beneath your flooring material. It supports the entire installation, distributing weight and providing stability. For tile projects, the subfloor must be especially well prepared because tile is rigid and unforgiving. Unlike carpet or vinyl that can flex slightly, tile will crack if the surface beneath it shifts, warps, or deteriorates.
Subfloors are typically made of plywood, concrete, or cement board. Each material presents its own challenges. Plywood may absorb moisture and warp, concrete can develop cracks or uneven patches, and cement board must be securely fastened and properly sealed. Regardless of the material, preparation ensures the surface is level, stable, dry, and clean before the tile is laid.
Why Proper Subfloor Prep Matters
Homeowners sometimes wonder if preparation steps are optional since skipping them seems faster and less costly. In reality, neglecting this stage leads to larger problems later. Proper subfloor preparation directly impacts how long a tile installation will last and how well it performs over time. An unstable or uneven surface causes tiles to loosen, grout to crack, and moisture to seep in, eventually damaging the structure beneath. These issues shorten the lifespan of the installation and compromise safety.
The financial impact is equally important. While preparation adds to the upfront cost, it prevents the much greater expense of repairs or replacements. A cracked tile floor often requires removing large sections to fix the underlying problems, multiplying labor and material costs. By investing in careful prep from the start, homeowners protect their flooring investment and avoid unnecessary expenses in the future. Proper preparation is both a safeguard for durability and a smart financial decision.
Evaluating the Existing Subfloor
Before any preparation work begins, an assessment is necessary. Professional installers inspect the subfloor to determine its condition. They look for:
- Moisture problems such as water stains, soft spots, or existing mold.
- Structural issues like loose boards, sagging, or cracks in concrete.
- Unevenness that would cause tiles to sit improperly.
- Residues from adhesives, paints, or old flooring might prevent proper bonding.
Skipping this evaluation phase can lead to surprises once the tiles are installed. For example, a subfloor that appears fine may actually contain moisture pockets. If overlooked, the tiles could start lifting within months.
Moisture Control and Its Impact
Moisture is one of the biggest threats to a tiled surface. Even small amounts trapped under the tile can lead to discoloration, weakened adhesive, and eventual detachment. Subfloor prep involves ensuring the base is dry and resistant to future moisture exposure.
For concrete, installers test moisture levels using specialized tools. If moisture is too high, steps such as sealing or applying a moisture barrier are taken before tiling begins. For wood subfloors, ensuring proper ventilation and sealing joints prevents future problems. This level of precaution ensures the beauty of the finished tile surface is not compromised by hidden water damage.
Leveling and Smoothing the Surface
Tile requires a flat surface for even installation. If a subfloor is uneven, tiles may rock or settle at different heights, creating lippage where edges protrude. Over time, this makes cleaning more difficult and increases wear.
Leveling techniques vary by material. Concrete may require grinding down high spots or applying leveling compounds to fill low areas. Wooden subfloors may need sanding, shimming, or the addition of underlayment materials. The goal is always the same: creating a completely even foundation. This step takes time, but it directly affects the professional look and durability of the final installation.
Strengthening the Subfloor
Sometimes subfloors lack the structural strength to handle tile. Tile and grout do not flex, so if the subfloor bends under weight, cracks are inevitable. Reinforcement might involve adding cement backer board or installing an uncoupling membrane that absorbs slight movements. These products not only provide strength but also improve adhesion for tile mortar.
Adding backer board requires precision. Panels must be cut accurately, secured with the proper fasteners, and seams must be taped and sealed. A rushed installation creates weak points that transfer stress to the tiles above. Skilled flooring professionals understand these details and apply industry best practices to make sure the foundation is as strong as the tile itself.
The Importance of Cleanliness Before Installation
One often underestimated part of preparation is cleanliness. Dust, grease, or remnants of old adhesive prevent proper bonding between the tile and the subfloor. Before installation, the surface must be thoroughly cleaned. Concrete may be vacuumed and washed, while wooden subfloors are swept, sanded, and inspected. Even the smallest debris can create voids under tiles, which eventually lead to cracking under pressure.
Cleanliness also applies to handling the preparation materials themselves. Mortars, sealants, and underlayment adhesives require clean conditions for full effectiveness. A properly cleaned base guarantees that every layer of the installation works as designed.
Comparing Proper Prep with Cutting Corners
To understand the importance of preparation, consider two scenarios. In the first, a homeowner decides to save time by installing new tile directly over an old surface without addressing the uneven areas. Within six months, grout lines begin cracking and tiles come loose in high-traffic spots. The cost of repair quickly outweighs the time saved.
In the second scenario, installers take the time to remove the old flooring, inspect the subfloor, repair damage, and apply a moisture barrier. The tiles remain stable for decades with minimal maintenance. While the initial labor was greater, the long-term result saved both money and frustration. This comparison illustrates how preparation is an investment rather than an inconvenience.
Common Mistakes Homeowners Make
Many DIY tile projects fail because of overlooked subfloor issues. Some of the most common mistakes include:
- Installing tile over subfloors that have not been leveled.
- Ignoring moisture testing before laying tile in kitchens or bathrooms.
- Using a thin underlayment that fails to provide stability.
- Leaving behind adhesive residues that compromise bonding.
- Assuming the old tile can always serve as a base for the new tile.
Awareness of these pitfalls helps homeowners appreciate the value of professional guidance.
Professional Standards in Subfloor Prep
Professional installers follow established standards to ensure every project has a solid foundation. These standards include conducting moisture and structural tests using reliable methods, following manufacturer guidelines for underlayment products, and applying high-quality sealants, mortars, and adhesives.
Consistency is equally important, which is why experienced professionals document each step of the process to guarantee nothing is overlooked. By adhering to these industry best practices, the installation meets performance expectations, and homeowners gain confidence that their new flooring will stand the test of time.
Subfloor Prep in Different Rooms
Different spaces in a home present unique challenges.
- Bathrooms require moisture barriers and careful sealing around plumbing penetrations.
- Kitchens need reinforcement in high-traffic areas where heavy appliances sit.
- Basements often have concrete subfloors that demand moisture testing and possibly vapor barriers.
- Living rooms may involve older wooden subfloors that require structural reinforcement.
Recognizing these variations helps homeowners understand why professional installers tailor prep work to each project rather than using a one-size-fits-all approach.
Why Professionals Excel at Subfloor Prep
While some preparation steps may appear straightforward, professionals bring knowledge and precision that make a lasting difference. They understand how different subfloor materials behave, from concrete that may need leveling compounds to wooden subfloors that require reinforcement. This insight allows them to select the right methods and products for each unique situation rather than relying on guesswork.
Professionals also recognize problems that are not obvious to the untrained eye. For instance, a homeowner might overlook subtle moisture issues in a basement concrete floor, while a skilled installer will test, identify the problem, and recommend a barrier before any tile is placed. This attention to hidden details prevents costly failures later.
Another reason professionals excel is their ability to apply preparation techniques efficiently and consistently. Cutting cement board, fastening panels correctly, or applying leveling compounds requires experience to achieve a flawless finish. Mistakes during these steps can create weak points that only appear months after installation. By following industry standards and drawing on hands-on experience, professionals create subfloors that stand up to heavy use and changing conditions.
In addition to technical expertise, professionals provide homeowners with peace of mind. Having a team that understands how to prevent problems before they arise ensures that the investment in new tile flooring is protected. The combination of skill, standards, and foresight is why professional subfloor preparation consistently delivers results that DIY projects often struggle to match.
Final Thoughts
Subfloor preparation may not be the most glamorous part of re-tiling, but it is the most critical. It influences durability, safety, moisture resistance, and even the aesthetics of the finished surface. By investing time and effort in preparing the base, homeowners safeguard their investment and enjoy a beautiful, long-lasting tile installation.
Trust our team at Foothills Flooring & Tile to handle your next re-tiling project with precision and care. We prepare every subfloor thoroughly to guarantee beauty and durability in every installation. Contact our team to start your flooring transformation today.


Recent Comments